February, 2025
Drywall/Plaster Repair for a Family Home
Corso Italia
Project Overview:
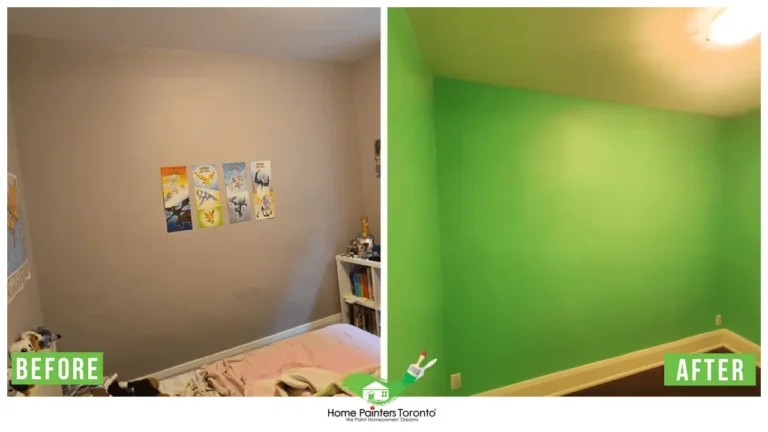
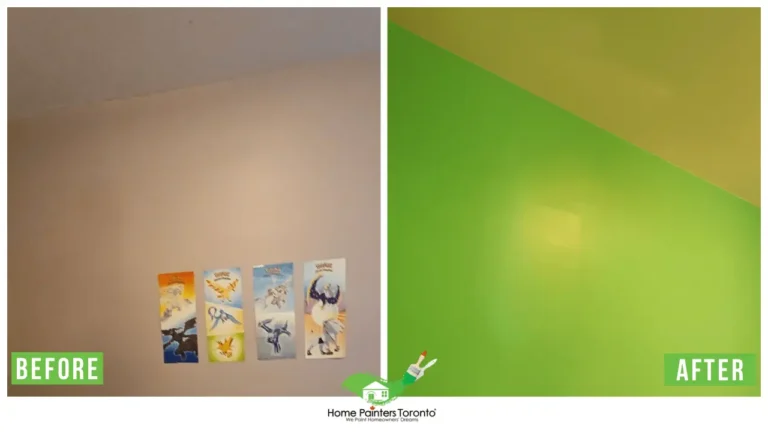
Jeffrey reached out to Home Painters Toronto for help with a serious issue in his daughter’s bedroom. One wall had extensive plaster and lath damage, with bulging, cracking, and crumbling plaster. The deteriorating wall wasn’t just an eyesore—it was unstable and unsafe, affecting the overall structure of the room.
His daughter had even tried to cover up the damage with stickers, but that was just a temporary fix. The wall needed a complete overhaul to restore safety and improve the space’s appearance. That’s when he called Home Painters Toronto to help resolve the situation.
After assessing the wall, we recommended replacing the damaged plaster with quarter-inch drywall for a more permanent solution. We worked quickly to ensure Jeffrey’s daughter could enjoy her room without the ongoing issues caused by the unstable wall.
Handyman
The Challenge
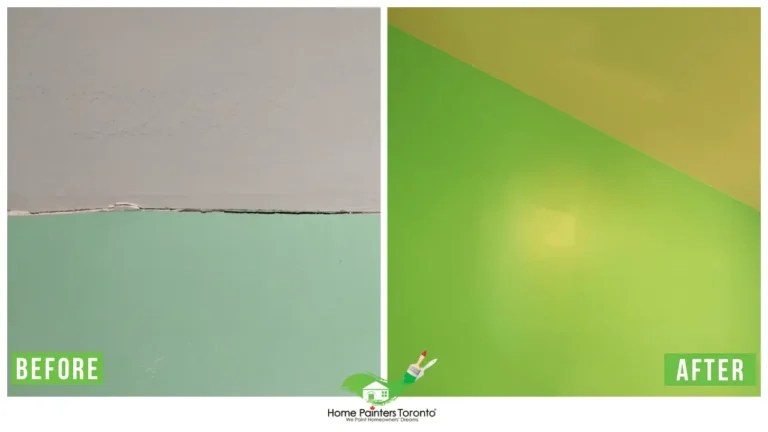
The biggest challenge was the condition of the plaster wall. Over time, the lath and plaster structure had deteriorated to the point where it was no longer secure. The plaster had started to peel away from the lath, causing it to crack, bulge, and crumble.
This left unsightly holes and a weak wall that wasn’t safe. The issue had become a real inconvenience for the family, especially with Jeffrey’s daughter living with a deteriorating wall.
The job required more than just filling in cracks or patches. Given how bad the damage was, we needed to remove the plaster entirely and replace it with a stronger, more reliable solution.
The Result
After just 2.5 days of work, Home Painters Toronto had successfully replaced the crumbling plaster wall with a new quarter-inch drywall. The end result was a smooth, solid, and stable surface that restored both the functionality and appearance of the bedroom. Jeffrey and his family were thrilled with the outcome—no more cracking, crumbling plaster, and no more makeshift stickers.
His daughter was finally able to enjoy a safe, clean room.
Scope of Work
Here’s a breakdown of what was done during this project to ensure the best possible result for Jeffrey and his family.
Step 1: Removal of Damaged Plaster
The first step in the process was carefully removing the damaged plaster. This wasn’t a simple patch job—it required taking out the plaster entirely because it had become unstable and was no longer adhering to the wall properly. We made sure to do this carefully to avoid damaging the surrounding areas, as we needed to create a clean surface for the new drywall to go in.
Additionally, new baseboards were fitted throughout the home.
Step 2: Installing Quarter-Inch Drywall
Once the old plaster was removed, we installed new quarter-inch drywall to replace the damaged section of the wall. This type of drywall was chosen because it’s both solid and thin enough to fit seamlessly into the existing structure of the room. By using this drywall, we ensured the wall was strong enough to avoid future issues while maintaining a smooth, flat surface.
Step 3: Taping and Plastering the Joints
After the drywall was installed, the next step was taping and plastering the joints where the drywall pieces met. This is a crucial step because it helps prevent cracks and gives the wall a seamless look. Once the tape was applied and plastered, we sanded it down to smooth out any imperfections.
This ensured that there were no bumps or rough patches, leaving the wall ready for painting.
Step 4: Sanding and Finishing
Once the plaster was dry, we carefully sanded the surface to make it as smooth as possible. This is the final step before painting, ensuring that the wall is ready for a flawless finish. The sanding also helped remove any small imperfections left from the plastering process, making sure the wall looked professional and clean.
BEFORE AND AFTER
Timeline & Outcome
The entire process took 2.5 days to complete, including the necessary drying time for the new drywall. Despite the tight schedule, the team worked efficiently and effectively to complete the job on time. By the end of the project, the bedroom wall was completely restored, and Jeffrey was extremely satisfied with the results.
No more crumbling plaster, no more temporary fixes—just a smooth, secure wall that was both functional and aesthetically pleasing.
Conclusion
This project is a perfect example of how Home Painters Toronto can handle complex drywall and plaster repairs. When walls become unstable or damaged, our team is ready to step in and provide expert solutions. Whether it’s replacing crumbling plaster or dealing with other wall issues, we ensure the job is done right and the results are long-lasting.
If you’re dealing with walls that need repair or replacement, Home Painters Toronto is here to help.
Our team of professionals can restore your walls to their original condition, providing you with a smooth, secure finish.