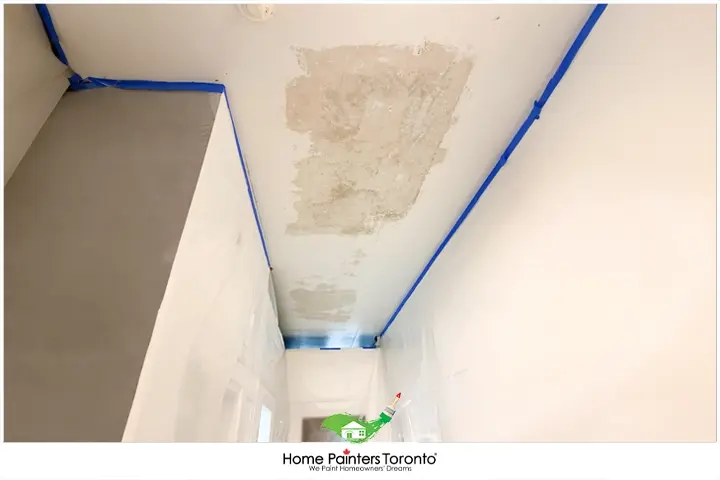
Are you looking for an easy solution to repair or re-texture your ceiling that is damaged? It happens. Sometimes your popcorn ceiling will get a water stain, a smoke stain, or a crack. When that happens, it is important to repair and re-texture your ceiling.
If you have a textured ceiling and you need to make repairs, the easiest solution is to re-texture the portion of your ceiling you repaired rather than apply a flat ceiling.
A damaged or uneven ceiling texture can detract from an otherwise beautifully decorated space. Re-texturing your ceiling is an excellent way to refresh your room and repair any damage caused by leaks, water stains, cracks, or general wear and tear. In this blog, we will provide a step-by-step guide to help you how to redo your ceiling and restore its former beauty.
How To Repair Textured Ceilings
Materials and Tools You Will Need
Here’s a list of the essential materials and tools for re-texturing your ceiling:
- Protective gear (goggles, gloves, and mask)
- Drop cloths or plastic sheeting
- Ladder or scaffolding
- Flat scraper or putty knife
- Sanding sponges or sandpaper
- Joint compound
- Texturing compound
- Mixing bucket
- Stirring paddle or stick
- Drywall tape or mesh (if needed)
- Wide and narrow taping knives
- Texturing brush, roller, or spray gun (based on the desired texture)
- Primer and paint

Step 1: Assess The Damage Before You Re-Texture Your Ceiling
This could very well be the most important step in the entire process. You might be tempted to just paint over the problem area or do a simple repair, and if so, think twice. If you do not assess why your ceiling is damaged and make any necessary repairs, the problem could keep coming back. Maybe you have a leaky pipe. Maybe there is condensation that is causing a water stain. Or maybe there is a leak in the roof. If your ceiling has a water stain, touch the stain. If it is dry throughout the day and week, then chances are it does not need repair. However, if it is wet at any time during the day, then it is best that you figure out the source of the water before you move forward.
Step 2: Fix The Damage Before You Re-Texture Your Ceiling
Once you have found what caused damage to your ceiling in the first place, it’s time to fix it.
Fixing the damage could be as easy as scraping off the damaged or cracked ceiling texture, priming, and applying a new texture. Or it could be as complicated as cutting into the ceiling to repair a leaking pipe. It may even involve getting on your roof to repair a crack or a leak.
This may be where you call in a professional handyman. Did you know at Home Painters Toronto we do more than just painting? Give us a call to help assess and fix ceiling damage.
Step 3: Decide On The Re-Texture Method
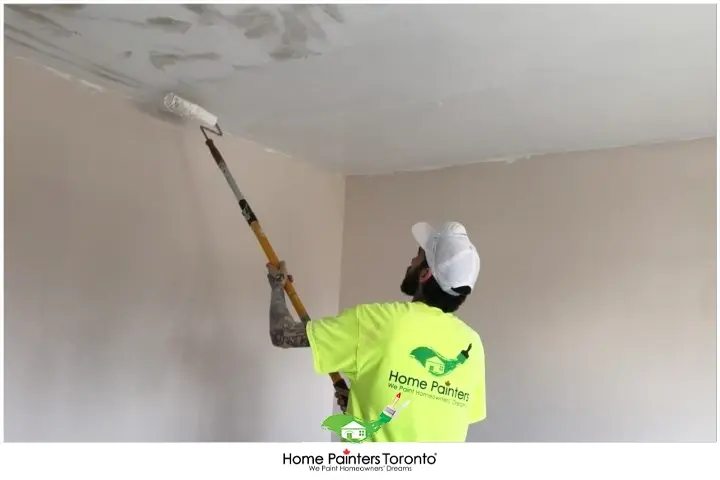
You can either spray on the ceiling texture or roll it on. There really isn’t a definitive answer as to which method is better, and many professionals have a personal choice. Spraying on ceiling texture is quicker and is a great choice for larger areas. If you are spraying a large area, there may still be corners or areas where you will need to brush or roll on the texture. Some find it easier to roll on ceiling texture because it can provide a more consistent texture. Whichever method you choose, be sure you have the right supplies.
If applying ceiling texture with a roller, you will need a loop roller that has a more fibrous nap.
Step 4: Protect Your Room and Yourself
Applying texture to a ceiling is a messy job. Lay a drop cloth on the ground and cover anything in the room you wouldn’t want the paint to accidentally land on. You also need to protect yourself. Make sure you are wearing protective glasses and a mask.
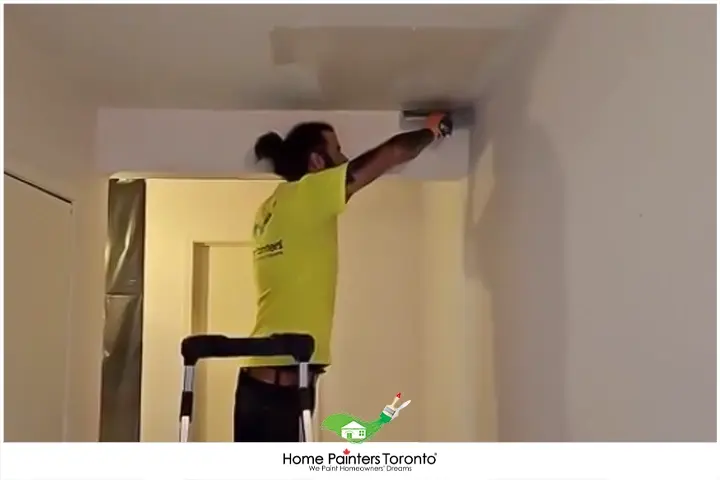
Step 5: Apply the Ceiling Texture
Whether you are using a roller or a spray, when it is time to apply the texture to the ceiling, it is important that you apply consistent light coats. Always work in one direction when spraying or rolling. Do not apply with back-and-forth strokes. Build up the ceiling texture so it is not lumpy or chunky. Let the texture dry between coats. Work swiftly but carefully. If you are simply patching a spot, you may need to repaint over the texture so the ceiling is all the same colour.


Necessary Precautions and Safety Measures
Re-texturing a ceiling involves several steps that can potentially be harmful if not done with proper care and precaution. Here is a guide to the necessary precautions and safety measures to ensure a safe and successful project:
WEAR PERSONAL PROTECTIVE EQUIPMENT
Re-texturing involves scraping off old textures, sanding, and applying new material – all of which can create a lot of dust and debris. Wearing a mask will help protect your lungs from inhaling these particles. Similarly, goggles can prevent particles or chemicals from entering your eyes. Wearing gloves can safeguard your hands from potential cuts or scrapes during the process and protect your skin from the potentially irritating ingredients in the texture compound.
USE LADDERS SAFELY
Since most of this project happens overhead, using a ladder or scaffold will be necessary. Safety is paramount when using this equipment. Make sure to set up the ladder on a stable, flat surface and never overreach when on the ladder—it’s safer to shift the ladder often than overstretch and risk a fall.
ENSURE PROPER VENTILATION
While priming and painting, it’s necessary to ensure that your workspace is well-ventilated. Many primers and ceiling paints emit volatile organic compounds (VOCs) which can cause dizziness and headaches and are harmful to inhale over prolonged periods. Open windows and doors, and use fans if necessary to maintain good ventilation.
WATCH OUT FOR LIGHT FIXTURES
Before beginning your work, turn off the electricity to any ceiling light fixtures at the breaker box for safety’s sake, then carefully remove the fixtures. This will also prevent damage to the fixtures and make them easier to clean if they do get dust or paint on them.
CLEAN UP CAREFULLY
When the job is done, be careful to clean up all the debris safely. Watch out for nails or sharp scrapers that might be hiding beneath the debris. Use a shop vac or similar vacuum to suck up the bulk of the dust, then mop or wipe down the surfaces to pick up the rest.
When to Seek Professional Help for Ceiling Re-Texturing
While re-texturing your ceiling is an achievable DIY project, situations may arise where you might need to consider professional assistance. Here are a few instances where calling in the experts could be your best bet:
Significant Structural Damage
If your ceiling has substantial structural damage, it may not be enough to just patch and re-texture the surface. This might include sizeable holes, sagging, or water damage that extends beyond the surface layer. These situations often require more intensive repair that can include replacing sections of drywall or addressing underlying structural issues.
Asbestos or Lead Paint
For homes built before 1978, there’s a chance that the existing paint or texture contains lead or asbestos. Asbestos in popcorn ceilings can release harmful particles into the air, which can cause serious health problems if inhaled. In these cases, it’s crucial to have the materials tested and, if necessary, removed by certified professionals.
Complex Textures
While many textures can be achieved with basic tools, others require specific skills and specialized equipment to execute correctly. If you’d like a detailed or complex texture that you’re not confident in creating yourself, a professional can ensure you get the results you’re after.
High or Vaulted Ceilings
Working on high or vaulted ceilings can be particularly challenging and even dangerous without the right equipment. Professionals have the necessary tools and experience to execute these jobs safely and effectively.
Working on high or vaulted ceilings can be particularly challenging and even dangerous without the right equipment. Professionals have the necessary tools and experience to execute these jobs safely and effectively.
Multiple Repairs or Larger Areas
If you’re looking at a substantial area of damage, spanning multiple rooms, or your entire house, the task might become overwhelming. In such instances, hiring professionals can save you significant time and ensure a uniform, finished appearance across all areas.
CONCLUSION
With some patience and perseverance, you can re-texture a damaged ceiling and transform it into a stunning feature. While this project may be time-consuming, the result is well worth the effort, restoring a smooth and uniform texture that enhances the overall appearance of your room.
Ultimately, home improvement is about enhancing living spaces while maintaining your safety and health. So, if the scale, complexity, or safety risks of a job make you uncomfortable, don’t hesitate to seek professional help.
If it’s time to re-texture your ceiling, you may want to make your first step a call to the professionals. It’s the best way to assess the situation and fix the damage. The last thing you want to do is spend all this time re-texturing an area only to have the problem reappear. Call the professional crew at Home Painters Toronto. Not only do we provide excellent painting services, but we also have professional construction workers on our staff. They will assess what caused the damage and determine the right way to fix it. Please give us a call at 416.494.9095, or email us at [email protected]. Also, don’t forget to follow us on all our social channels below as well!


