Have you installed unfinished wooden floors or want to give your existing floors a new look? Freshen up the vibe of your wooden floors and incorporate an exciting new feature in your home by staining them! Years of wear and tear can do a number on floors, but the good news is that hardwood’s versatility can give your wooden floors new life with a little staining! Read on to learn how to stain hardwood floors.
The Critical Role of Floor Staining in Enhancing Interior Spaces
The decision to stain hardwood floors is seldom purely aesthetic. While the transformative effect on a room’s appearance is undeniable, the importance of floor staining extends far beyond mere surface-level beauty. This practice encapsulates a strategic pursuit of durability, value enhancement, and personalization of living spaces, making it a crucial consideration for homeowners and professionals alike.
Durability and Protection
Hardwood floors are subjected to daily wear and tear, from foot traffic to accidental spills. The application of a stain, followed by a protective topcoat, acts as a shield, significantly extending the life of the wood. This protective layer not only defends against physical damage but also minimizes the effects of sunlight and humidity. By investing in this preventive measure, you ensure the longevity of your floors, maintaining their integrity and appearance over time.
Aesthetic Appeal and Customization
Staining offers the unique opportunity to customize the colour of your hardwood floors to match the specific design vision and ambiance of a space. Whether you’re aiming for a cozy, rustic look with a dark, rich tone or a modern, airy feel with a light stain, the options are virtually limitless. This level of personalization is especially valuable in renovation projects where blending new sections with older flooring is necessary for a cohesive design.
Increased Property Value
The appeal of well-maintained, beautifully stained hardwood floors to potential homebuyers is considerable. This aesthetic improvement can significantly impact the overall valuation of a property. It’s not merely about the visual aspect; it’s the perception of quality and the care invested in the property. Well-executed floor staining speaks volumes about the homeowner’s attention to detail and commitment to maintaining the home’s integrity and appeal.
Environmental Considerations
Choosing the right type of stain can also have environmental implications. Water-based stains, for instance, contain lower volatile organic compounds (VOCs) than their oil-based counterparts, contributing to better indoor air quality and making them a more eco-friendly option. For those conscientiously making environmentally responsible choices, the selection of stains becomes another avenue to support sustainable living practices.
The Cost-Effectiveness of Staining
Compared to other flooring options, staining existing hardwood floors is a cost-effective way to refresh a space. Instead of undertaking a complete hardwood floor repair, and floor replacement, staining can breathe new life into dull or worn hardwood, making it an economical choice for those seeking to upgrade their interior spaces without incurring the expense of new flooring.
How Much Will Hardwood Floor Staining Cost?
The price to stain wooden floors really depends on the condition of your flooring and the route you take to do it. If you’re looking to make things a bit less expensive for yourself, you can actually rent a sander for usually $60 – $100/day. Then you have the cost of the stain and other materials. Mind you, it could take you several days to complete the work, depending on the size of your space.
If you want to hire professionals, the price will go up. Usually, the cost is anywhere from $3 – $4 per square foot for hardwood floor staining. For a 1,500 – 2,000 square foot home that has wooden floors that need staining and complete refinishing, it will cost somewhere between $3,000 – $7,500. Again, this all depends on the size of the space and the condition of the hardwood flooring.
Materials Needed:
- Safety Goggles
- Dust Mask
- Sandpaper
- Electric Sander
- Stain
- Sponge
- Rags
- Bucket With Water/Wood Floor Cleaner
- Mop
- Vacuum
- Paint Tray
- Paintbrush
- Painters Tape
- Polyurethane
Step-by-Step Guide on How to Stain And Seal Hardwood Floors
Step #1: Prep Your Wooden Floors
Wash your floors and make sure the floor where you will be staining is cleaned thoroughly. Vacuuming and mopping are recommended.
Begin by putting on your safety goggles and dust mask to prevent any dust from irritating your eyes and lungs.
Apply painter’s tape if necessary to protect other areas from accidental splashes. Stain, unsurprisingly, can stain other things just as easily as the floor you want covered, so take extra caution here.
Step #2: Sand Before Floor Staining
Using a floor sander, sand the floor completely. This may take some time, but you need to stain over a properly sanded surface for optimal results.
Vacuum and mop over the floor again once you have finished sanding it.
Step #3: How to stain hardwood floors
Using either a paint tray or the can, dip the sponge into the stain and apply it to the floor. Always go with the grain of the floor, not against for easier and more consistent staining.
Make sure you stain from one side to the other and squeeze out the sponge often so the stain applies equal amounts of coverage.
You can choose a water-repellent stain if you are staining the hardwood floors in your kitchen for extra protection from moisture damage.
You can choose to use a paintbrush for areas that need a little more precise application.
Let the floors dry once they are completely stained. Overnight is probably long enough to ensure it has dried thoroughly.
Once completely dry, apply polyurethane over the stain. This will help coat the floor with an additional seal and will help reduce the possibility of chipping or overall wear and tear.
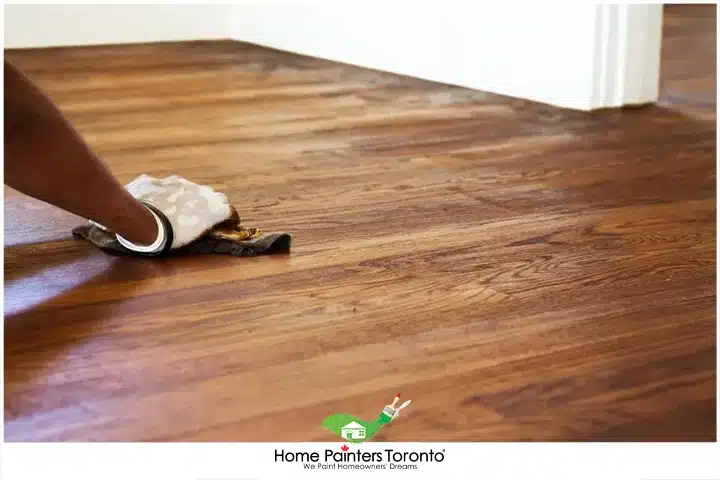
A great tip!
- Although not necessary, when applying the stain, the length of time you let the stain sit will reflect how dark the finished product will appear.
- If you don’t want the stain to be too dark, you can always wipe away excess stain after you have applied it – this will lighten it up.
Important Safety Tips for Sanding
As with anything DIY or home renovation involved, you have to make sure to keep safe! So, when you get yourself an industrial sander, it’s important that you know how to use it. Always ask the rental place for a properly sized extension cord. That way your power won’t short at home. Also, be sure you have the correct abrasive sheets on your orbital sander as well. If things aren’t attached correctly or even if you try to go too quickly around the room, you can notice things later. In the end, you want to make your wooden flooring look better, not worse! All of these little tips add up.
MORE related BLOGS RELATED TO
“How to Stain hardwood floors”
Now that you have learned how to stain your wooden floors, you probably discovered that it is much easier than you thought! The only downside to this is that it can take some time to sand your floors depending on how much surface area you choose to stain. If the floor staining doesn’t seem like something you can see yourself investing time into, Home Painters Toronto will invest their time – no problem at all! Call us NOW at 416.494.9095 or email [email protected]! And don’t forget to follow us on our social media channels below!


