Wainscoting is a style of wooden panelling that is usually found lining the lower part of the wall in any room. Wainscoting is a lengthy process to do yourself, but not as hard as you might think. With the right tools and supplies plus a little time invested, you can obtain classic-looking wainscoting in your own home in a weekend or less!
How To Put Up Wainscoting
Why Wainscoting?
While completely aesthetic, wainscoting serves a two-fold purpose. First, it adds a layer of depth and texture to a space, enhancing its visual appeal. Second, it provides an additional layer of protection for your walls, particularly in high-traffic areas where bumps and accidental knocks might occur.
Now, let’s dive into the process!
Choosing Your Wainscoting Material
Wood
Rich in tradition, wood is a classic and durable choice for wainscoting. Common types include oak, pine, and cherry. The beauty of wood lies in its natural grain and texture, which enhance the warm and elegant feel of your space. However, keep in mind that it requires periodic maintenance to preserve its charm and tends to be a pricier option.
Medium-Density Fiberboard (MDF)
MDF offers a cost-effective alternative to wood. Its smooth surface makes it a dream to paint, allowing you to achieve a flawless finish easily. While it’s more resistant to changes in humidity and temperature compared to wood, it’s not as robust when it comes to handling impacts and is susceptible to water damage.
Polyvinyl Chloride (PVC)
PVC brings with it a high degree of durability and resistance to moisture and insect damage, making it a practical option for bathrooms and kitchens. However, it doesn’t offer the natural look of wood and is more difficult to paint.
Wainscoting Ideas and Design Styles
Now that we’ve bridged the gap between you and your material choices, let’s journey into the captivating world of wainscoting ideas and designs. Every style carries its own historical influence and aesthetic charm; your choice here significantly impacts the mood and atmosphere of your space.
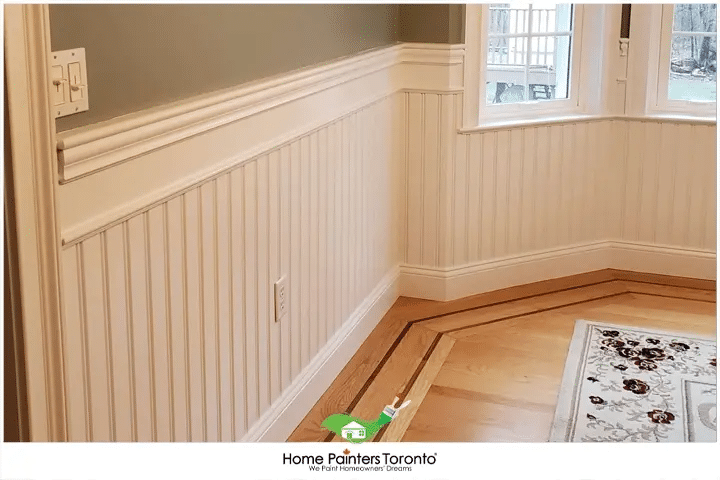
Beadboard
Beadboard style is identified by its signature vertical grooves, lending a casual yet elegant, cottage-like charm. It shines as a one-size-fits-all solution, adapting beautifully to both traditional and modern spaces.

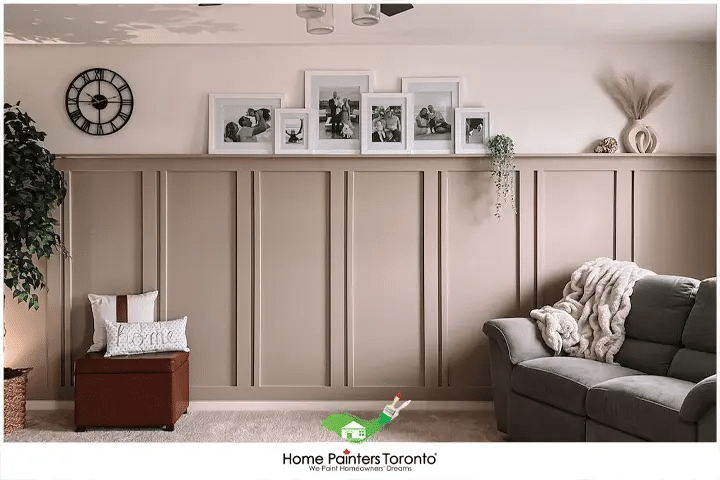
Board and Batten
Featuring alternating wide boards and narrow battens, a board and batten style creates a timeless and dramatic statement. This design is an excellent choice if you’re seeking to add depth and visual interest.

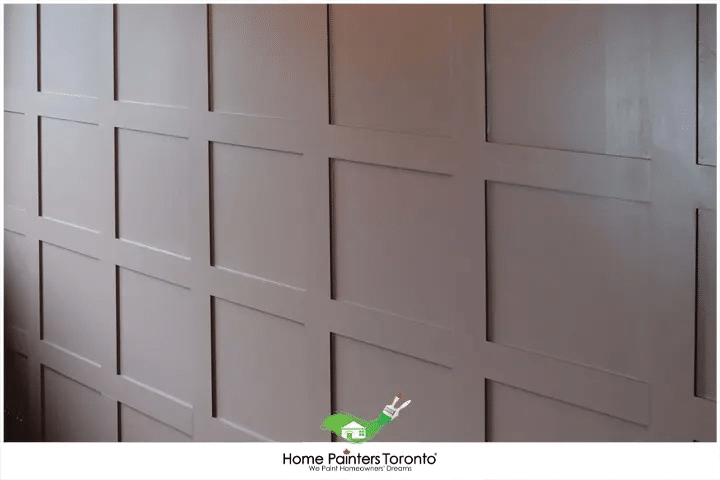
Panelled
Paneled wainscoting is an ode to classic elegance. With its raised or flat panels framed by stiles and rails, it offers an intriguing play of shadow and light – a surefire way to add a touch of sophistication.

Putting up Wainscoting
DIY Wainscoting Kit Materials That You Will Need:
- Safety Goggles
- Pry Bar
- Level
- Measure Tape
- Painters Tape
- Pencil
- Circular Saw
- Plywood
- Panel Adhesive
- Caulking Gun
- Stud Finder
- Nail Gun
- 2 1/2″ Nails
- 1 1/2″ Nails
- Miter Saw
- Hand Saw
- Speed Square
- Chisel
- Wood Filler Putty
- Calculator
- Stile
1. Determine Where The Wainscoting Will Go
- Remove the old trim with a pry bar carefully and slowly if you want to reuse the trim again.
- Determine where you want to install the wainscoting and mark it off with painter’s tape.
- Divide the width of the wall by the number of panels you want, and mark that measurement on a piece or strip of wood longer than the wall. This is called a swing stick, and it basically serves as a tool that will keep the spaces between each panel precise.
- Pad out the lower corner of the wall with one stile plus the thickness of the opposite wall’s wainscoting. Put the swing stick against the blocking and lower the opposite end until the mark lines up with the wall’s furthest edge. Tape that firmly in place.
- With your level as a guide, put hash marks on the painter’s tape.
- Now you have the distance marked from the outside edge of one stile to the inside edge of the next one.
2. Level and Find Studs
- With your level, draw a straight line to determine the height of the wainscoting minus the height of the chair rail cap. Draw this line around the whole room that you will be installing the wainscoting in.
- Make sure you wear your safety goggles and, using a circular saw, cut a 1/4″ piece of plywood vertically so it will fit between the old trim/baseboard and the level line.
- Rip panels so the seams can be covered by the stiles.
- On the back of each panel, apply panel adhesive generously using a caulk gun.
- Find any studs behind the wall with a stud finder, and mark where they are with painter’s tape.
- It is always a good idea to have someone assist you with this part: With your circular saw, cut the top rail to the length of the wall.
- Nail through the rail with a nail gun and into the studs using 2 1/2″ nails.
3. Find The Stile Length, Measure and Fill
- You need to find out how long the stiles need to be cut, so measure the distance between the top rail and the old baseboard at 3 points. Subtract the shortest one and the height of the bottom rail stock.
- With a stop block on your miter saw, cut all the stiles to the length you came up with after the calculation.
- Find a spacer block by cutting a scrap piece of wood and cutting it to the calculation of the panel width marked on the tape, subtracting the width of one stile, and using that calculation as your spacing reference.
- Put panel adhesive on the back of each one and attach them together using a nail gun and your 2 1/2″ nails.
- Right where the two stiles meet by the corners, the overlapping piece needs to be wider for the depth of the stock for the corners.
- Rip a wider stile from a larger stock for every corner. Put the wider stile next to the adjacent wall and glue as well as nail securely.
- Make sure the bottom rail is snug against the ends of the stiles, and if you need to use shims, be sure they are securely between that and the baseboard. Don’t worry if there is still a small gap at the bottom; the trim/baseboard should cover that up later.
- Nail through the rail and into the studs as well, using the 2 1/2″ nails.
- Nail any scraps from the plywood and pad out the prior baseboard so it is flush with the bottom rail. Make sure the baseboard is in place, and use shims to make sure the lower end is level.
- Measure the gap between the bottom of the baseboard/trim and the floor, then cut a scrap block that measurement to fill it in.
4. Apron Installation
- Cut a spacer and match the space of the bottom rail that will be exposed, and then use that to position the baseboard so you can nail it securely.
- Since each run of molding will be at a corner, you can miter the end of the opening. Miter the run at 45 degrees for an outside corner, and then cut a second piece that will meet the 45 degrees and die square it into the wall or casing.
- Make sure the top edge of the apron is aligned with the top edge of the rail, and nail it securely. Glue the return into the slot with caulking.
- You may have to notch the chair rail if your existing casing is not in the best shape. Hold the chair rail firm and scribe the shape of the moulding. Use a hand saw to cut the notch, and it will give you a better-looking joint.
- Now that the returns are taken care of and assembled in place, miter any of the ends that end at a corner. Caulk and nail to the ledge from the apron and upper rail.
5. Finish Off
- Position the shoe moulding so it is on the floor and against the baseboard, and the base cap on the upper edge of the baseboard. Using a nail gun, nail with 1 1/2″ nails and work around the room wherever necessary.
- Miter the panel moulding 45 degrees so that it lines along the inside edges of the panels. Glue or nail it into place. Using a wood putty filler, fill in any holes along the way.
- Sand any rough surfaces, and later you can choose to prime or paint them!
To Sum Up
Remember, the beauty of wainscoting lies in the details, so taking the time to measure accurately, cut precisely, and align perfectly will pay dividends in the form of a beautiful, upgraded space.
Embarking on a wainscoting project can seem like an enormous task, but remember, every big task is just a series of smaller ones. I hope this guide has helped break down the process into manageable milestones and given you the confidence to add this enduring classic to your own home.
More Interesting Blogs Related to
“How To Put Up Wainscoting”
Now that you have successfully learned how to put up wainscoting, you have probably discovered how long the DIY wainscoting process can be! But you probably also realized that, with the assistance of professional wainscoting installation and all the necessities for this project, it wasn’t as hard as you thought! If this is too long of a process for you, give Home Painters Toronto a call and they can help you out. They’ll also finish off your project by painting or staining it for you, so you don’t need to invest any more time in this! Call us NOW at 416-494-9095 or email [email protected]! And don’t forget to follow us on all our social channels below!


