
If you have exterior rotted wood on your window sills, it’s a good idea to repair them as soon as possible. Rotted wood can allow moisture into the house and cause other problems, such as mould growth.
Over time our homes experience wear and tear from the seasonal elements. Especially for Toronto homes, we experience everything from heavy snow in the winter to balmy summer torrential downpours. Occasionally, a repair on the exterior of our house will need to be done that some fresh exterior painting can’t fix. This project is for those who have a bit of prior handyman experience. So, let’s dig right into what you’ll need and how to repair exterior wood on a window sill.
How to Repair Exterior Rotted Wood On A Window Sill
Repairing A Rotted Window Sill is a great way to increase the longevity of your home. Having a window that doesn’t leak or rot is important for many reasons, especially during the winter months when we want to keep our homes warm and cozy. The Summer heat can be equally as damaging on wood as well if left unchecked, causing mould growth due to moisture buildup.
Here’s how to fix a rotted windowsill:
Materials Needed
Putty Knife
Pry Bar
Claw Hammer
Wood Chisel
Circular Saw
Utility Knife
Pencil
Hand Plane
Table Saw
Cedar/Redwood Lumber
Drill and Various Drill Bits
Epoxy Wood Filler
Sandpaper
Caulking
Exterior Wood Primer
Exterior Wood Trim Paint
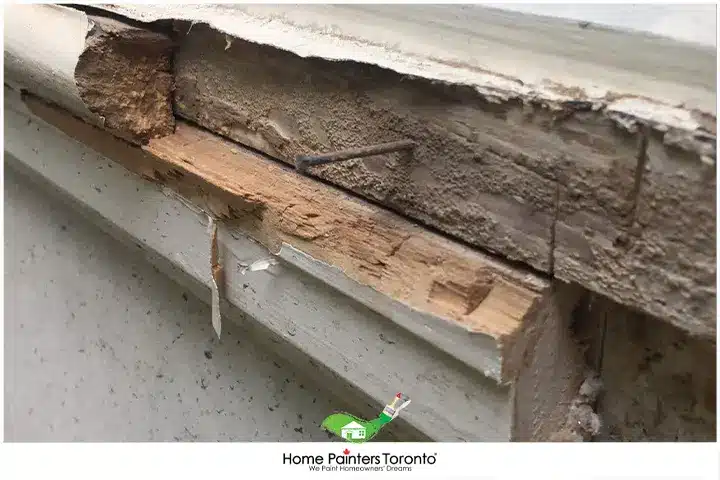
1. Prep Rotted Window Sill
- Break the caulked seal along the rotted window sill with a utility or putty knife. Scrape the paint off of the window sill closest to the wall and partially pull out old nails with a pry bar. If you would like to save the wood, finish taking the nails out with a claw hammer to avoid damaging the trim. You should be able to pry the entire unit out as one piece.
- Chip out any remaining rot in the sill with a wood chisel and hammer.
2. Cut the Exterior Rotted Wood
- Now you need to cut off the window sill part that extends past the siding. This is usually the rotted part. If this doesn’t come out as one piece, use a pencil to draw a straight line and cut along it with a circular saw. Use an oscillating blade to cut the part of the window sill the circular saw can’t cut. Smooth out the cut with a hand plane.
- You’ll need to cut a new sill or get a replacement strip from cedar lumber or redwood using a table saw. You can use the old window sill or cut piece as a template.
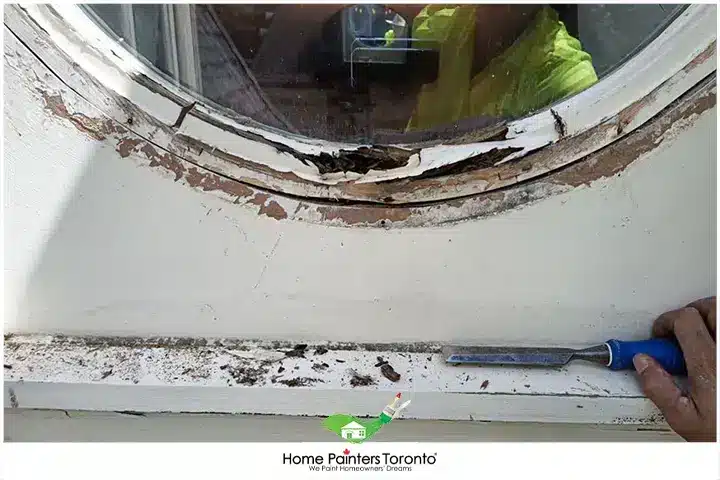
3. Drill the Window Sill
Drill the new window sill into the waterproof construction adhesive and clamp it together by drilling 3 ½ inch deck screws through the plastic and into the wood about ¼ inch.
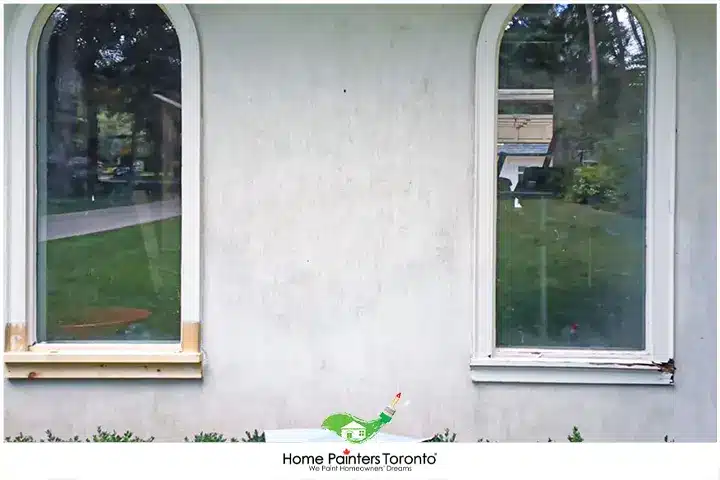
4. Fill Epoxy Filler to the Rotten Window Frame
Using an epoxy wood filler, fill in the screw holes and sand it out once it has hardened. Caulk along the edges of the new window sill with acrylic latex caulking and replace the trim with new properly measured trim or by using the old existing trim. Fill in any nail holes that you may find caulk and sand it out.
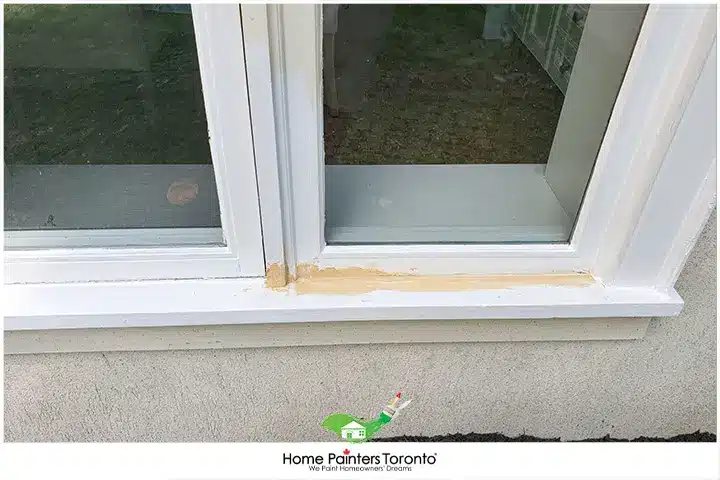
5. Prime and Paint the Window Sill
Using an exterior wood primer, prime the window sill with two coats – let dry. (Determine how long to wait for the primer to dry based on the label on the primer)
Paint over the primed Window sill with the desired colour of exterior trim paint and let dry.
Like most wood, over time it will rot. If your exterior wood trim has been neglected and not well maintained, the seasonal weather changes will definitely create a rotting issue. So after this repair – keep regular maintenance of your exterior wood trim by using a waterproof wood sealer and checking periodically for cracks and issues so you can fill them in before the wood begins to rot. Doing this keeps the exterior wood trim looking attractive!
Ways to Protect After You’ve Repaired a Rotten Window Sill
When you’re done with repairing window sill damage, there are still some steps you can take to protect your window sill from further damage. We’ve got a few tips to help you keep your wood looking great for years to come:
- Keep the windowsill clean. Mould and mildew are common problems with wood, especially if you live in a humid climate. Cleaning the windowsill regularly will help to prevent mould growth and keep it looking great!
- Use a wood sealer to protect the wood from moisture damage. Waterproofing can help your trim last longer by preventing water penetration into the wood.
- Prime and paint your window sill yearly to prevent damage from sun exposure. This process also helps protect your wood from moisture, dirt, and insects – keeping it in good condition for years to come!
- Inspect your window sill regularly for cracks or rot so they can be repaired before they become a bigger issue.
Wood Restoration Carpentry & Repair
Maybe now’s the time to really think about fresh exterior painting!
Now that you’ve figured out how to repair exterior rotted wood on your window sill, you have the chance to stand back and really take a look at your home. Are you really happy with the overall look of your exterior painting? How about the window trims and soffits and eaves? If you want a uniform look but totally refreshed, now is the time to take action.
When you’re trying to think about a new look for the exterior of your home, you always want to consider the overall design aesthetic of your neighbourhood. Are they mostly classic homes or have they just recently been built? Take a look at some of the different colour schemes, especially in terms of brick and siding. Follow suit and maybe put your own spin on things when you decide to do this yourself. For some of the top colours for aluminum siding, visit this blog here!
Top Related Blogs Related to
“how to repair exterior rotted wood on a window sill”
If you reside in Toronto and the GTA and need some help with your exterior painting, don’t hesitate to call us! We will help you pick the colours you want and show you the latest painting and home renovation trends. Our home painting services with the best pro painters have been around now for over 36 years. Call 416.494.9095 or email [email protected] for a FREE quote for your home painting needs. And don’t forget to check us out on our social media channels below!


